
How do I invite my team members?
Managing Team Members
Account holders can invite team members to help manage tasks in DonationScout or simply give them access to view activity. You can control each team member’s location access and notification preferences when inviting them.
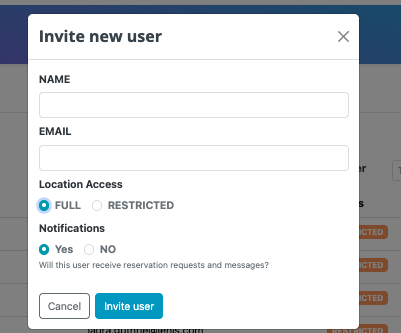
Add an Invited User
To invite a new team member:
- Navigate to User Management under the Profile dropdown in the navigation bar.
- Select Invite New User.
- Enter the user’s name and email address.
- Select their Location Access and Notification settings.
- Click Invite User.
Pending Invites
Once invited, the user will receive an email with instructions to set up their account. Their status will remain Pending until they accept the invitation.
User Types
When inviting a team member, you’ll choose their level of location access. This determines which locations they can access and manage.
Full Access User
Selecting Full under Location Access gives the user access to all of your locations.
Full Access Users can manage reservations and other activities for all locations associated with your account.
Restricted Access User
Selecting Restricted allows you to choose which locations the user can access.
This option is ideal for team members who only need to manage or view activity for specific locations.
Notifications
You can choose whether each team member receives DonationScout notifications.
Select Yes if the user needs to receive notifications about activity such as new requests, approvals, reminders, or on-demand messages.
Select No if the user only needs access to the dashboard to view events and activity but does not need to receive notifications.
Tip: For team members who are primarily using DonationScout to monitor activity, selecting No can help reduce unnecessary notifications while still giving them access to the information they need.